How to set up Bridge Networking with a Wireless Interface in KVM
22 Jan 2022 | tutorial , kvm , networking , linux , vfio , vmBy default, KVM sets up a NAT network for guest VMs. This is fine for most use cases, but I wanted to access the guest VMs via my local network. Bridge networks allow guest VMs to obtain an IP address on the local network’s subnet, which allows any device on the network to communicate directly with the guest VM.
However, KVM only officially supports bridge networking with wired interfaces. For wireless interfaces, a lot of the information is outdated and/or incomplete so here’s my take on it. I’ve mixed and match several sources and managed to get it working.
Concept
The workaround to creating a bridge network is to use something called Proxy ARP. ARP, in a nutshell, matches IP address with MAC address in your network.
How does ARP works? For example, we have two devices in our network A and B, and A wants to know the MAC address of device B. First, device A will use ARP to query for the MAC address of device B. Then B would respond to the ARP query with its own MAC address.
In the case of Proxy ARP, as the name suggest the ARP response is done by someone else. For this workaround, the host machine will respond to ARP request directed towards the guest machines.
How To Set Up Bridge Networking
The simplest way to set up bridge networking is via virt-manager. Under Edit > Connection Details > Virtual Networks we will add a new virtual network.
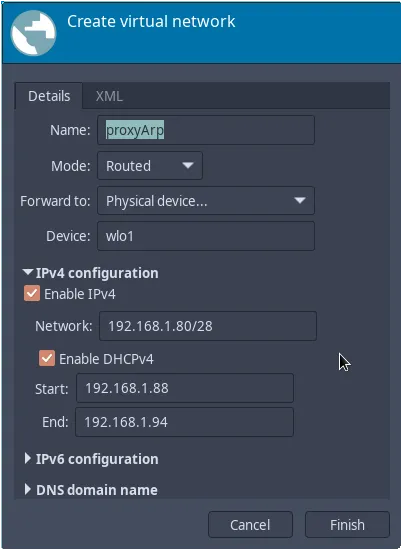
- Name: Network name. Put something that you’ll be familiar with.
- Mode: Choose Routed.
- Forward to: Choose Physical device..
- Device: Input the name of your wireless interface. In my case, my wireless interface is
wlo1.
IPv4 configuration
Here, we set the range of IP address the guest OS will receive. Here you should input an IP address range that is same as your local network’s subnet. Note that the IP address are assigned by the host machine and not your router. Hence, the IP address listed here should not be in the same range as your router’s DHCP address to avoid IP address conflicts.
In my case, my local network’s subnet is 192.168.1.x. I then set the range to 192.168.1.90/28, which is between 192.168.1.88 and 192.168.1.94. In my router settings, I set my DHCP address range to between 192.168.1.100 and 192.168.1.254 to avoid conflicts.
For IPv6 configuration and DNS, I left it at default settings.
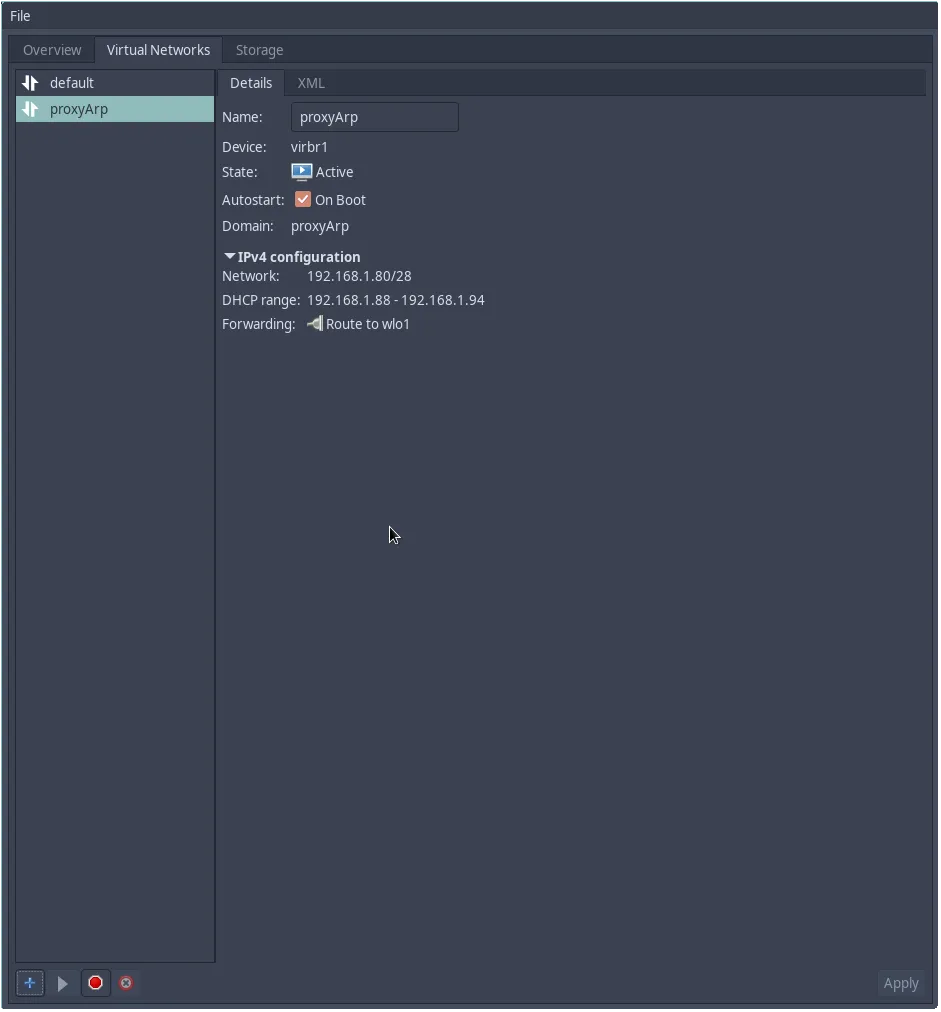
Click Finish, and the virtual network will be created:
Change network interface for guest VM
We then change the network interface for the guest VM. Under virt-manager, we edit the guest VM configuration by selecting the NIC assigned to the guest VM and change the network source to the newly created network bridge interface, in this case virbr1.

Hit Apply to save the configuration.
Setting up proxy ARP
We need to enable proxy ARP on both the wireless interface and the bridge interface. We do this by using sysctl:
$ sudo sysctl net.ipv4.conf.wlo1.proxy_arp=1
$ sudo sysctl net.ipv4.conf.virbr1.proxy_arp=1
Replace wlo1 and virbr1 with yourr wireless interface and bridge interface respectively.
Try it out!
Try starting up your VM. If all goes well, your VM will receive an IP address with the same subnet on your local network and working internet connection, and your host’s internet will continue to function normally.
Persisting proxy ARP settings
The proxy ARP settings above only takes effect until you reboot your machine. In order to persist the configs, we need to add them into the sysctl config file. In arch linux, we create a file in /etc/sysctl.d/proxy_arp.conf:
net.ipv4.conf.all.proxy_arp=1
net.ipv4.conf.wlo1.proxy_arp=1
net.ipv4.conf.virbr1.proxy_arp=1
Reference
- https://specman1.wordpress.com/2014/01/02/wireless-bridging-virtual-machines-kvm/
- https://unix.stackexchange.com/questions/159191/setup-kvm-on-a-wireless-interface-on-a-laptop-machine
- https://wiki.archlinux.org/title/Sysctl#Configuration
If this doesn’t work for you, try this instead if you have a spare router lying around:
Self-taught full-stack web dev based in Tokyo.
Occasionally wrecks servers through
self-hosting
and
homelab-ing .