How to Reset an Oracle Cloud VM Instance
30 Apr 2023 | oracle , cloud , vm , uefi , tutorial , netboot.xyz , netboot , ipxe , debian , nixosIn a cloud environment, you would typically “reset” a VM to its factory state by destroying and recreating an instance. However, Oracle Cloud’s free resources are pretty much unobtainium right now, where it’s most likely you’ll see the “out of capacity in your region” error message. Even with an automated script to attempt creating an instance periodically, it’ll still take a couple of days to actually get an instance recreated.
At the same time, unlike in a local machine you can’t just plug in a USB and boot into a live environment and format + reinstall the OS. But with the power of netbooting we can somewhat replicate something similar in a cloud environment.
Part 1: Prepare netboot environment
First, we will need to prepare an netboot environment to boot into. Netboot, as the name somewhat suggests allows us to boot into a live installation via the network, skipping the need to boot into a physical media. Here we will use netboot.xyz, which will act as a gateway to boot into a Linux distro’s live environment.
In your Oracle Cloud instance, download the netboot.xyz image to /boot:
$ cd /boot
$ wget https://boot.netboot.xyz/ipxe/netboot.xyz-arm64.efi # for ARM instances
$ wget https://boot.netboot.xyz/ipxe/netboot.xyz.efi # for x86 instances
Part 2: Setting up a VNC connection
Next, we need to set up a VNC connection. Unlike an SSH connection, a VNC connection to our instance allows us to control the instance during the reboot process, which we will be able to change the boot method.
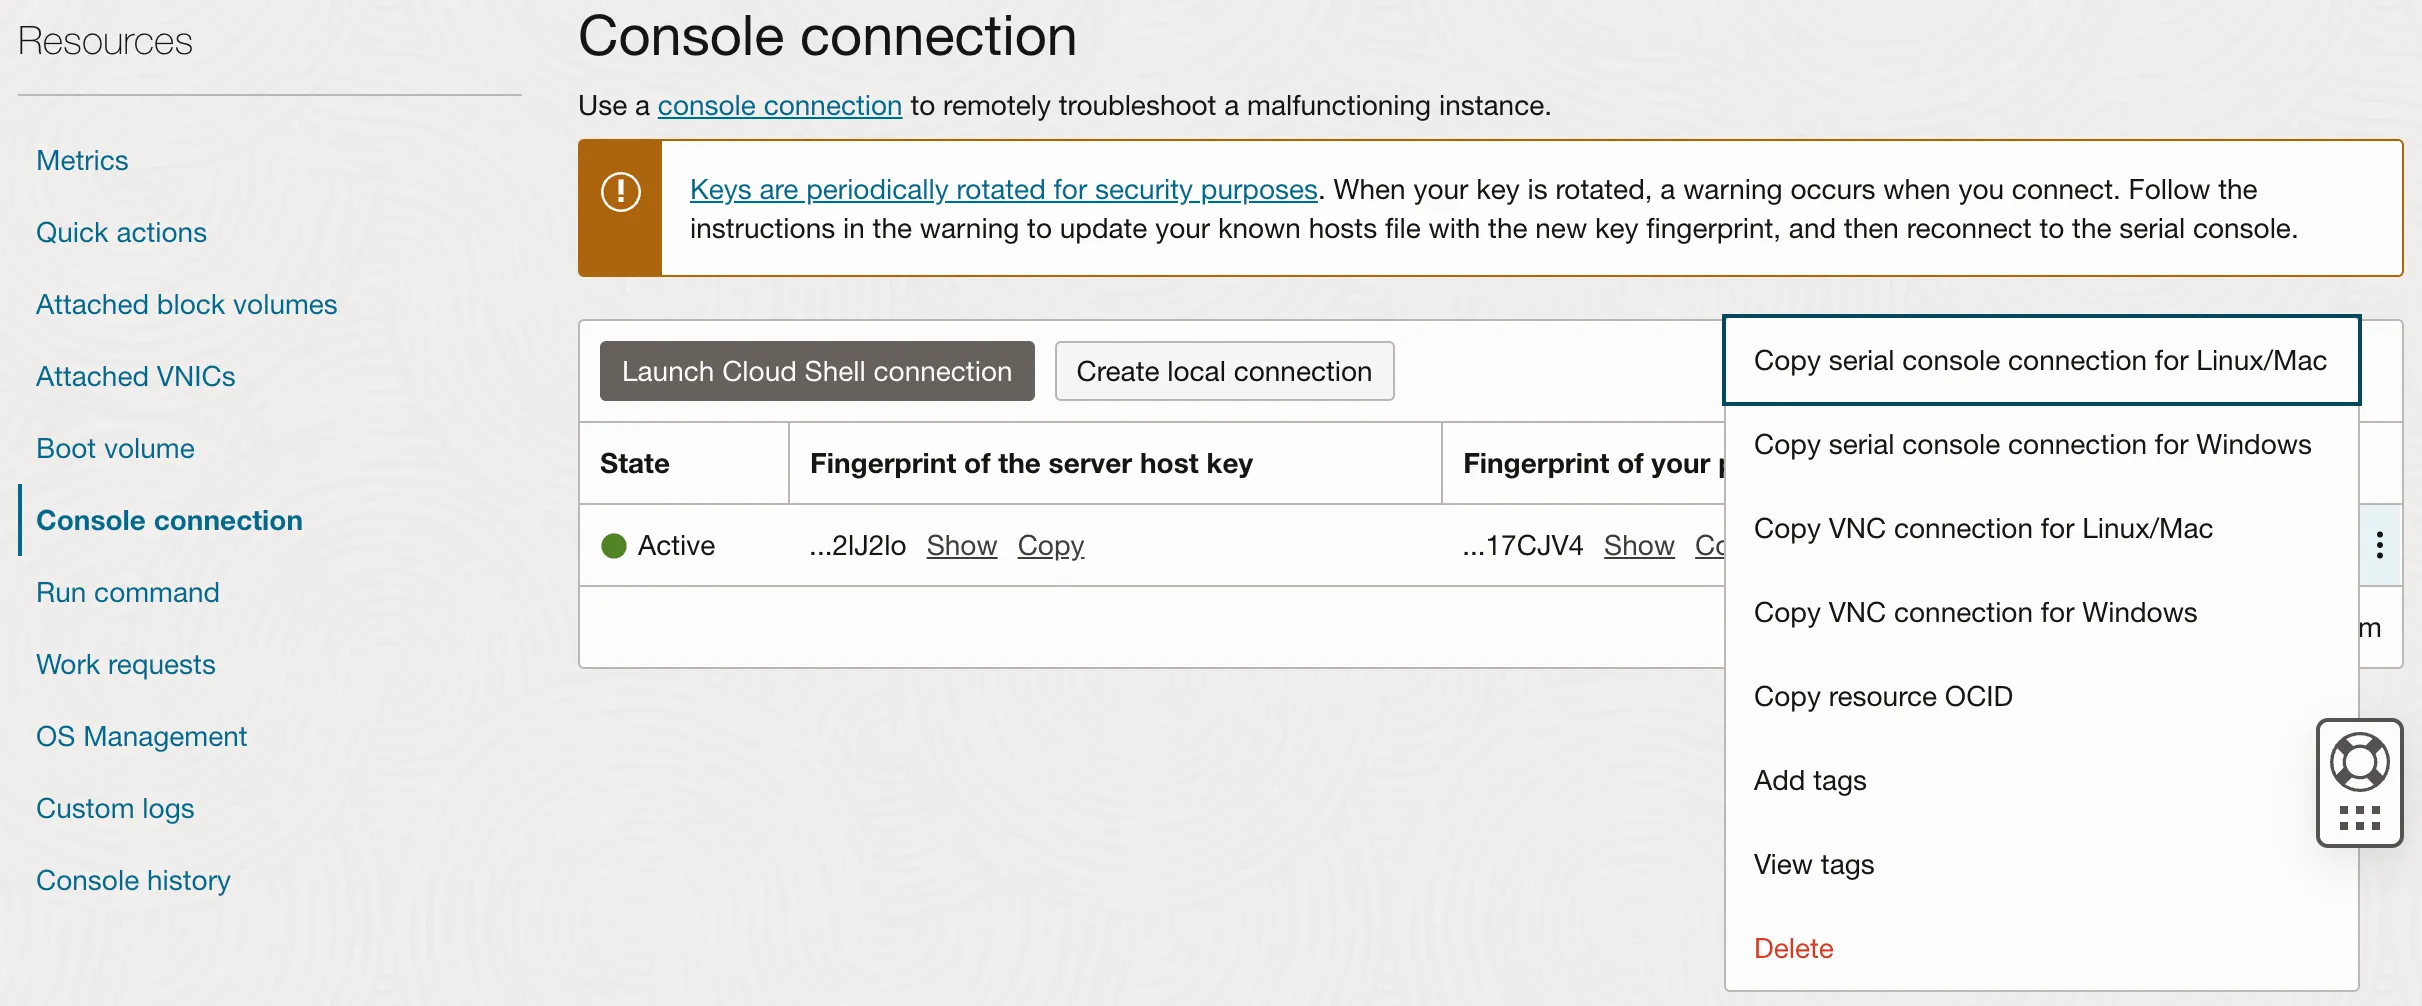
In your Oracle Cloud console, go to Compute > Instances > [instance name] and select Console connection on the Resources sidebar on the left. Then, select Create local connection and setup a SSH keypair. Then create the local connection.
When the connection is active and running, click the three dots on the right > Copy VNC connection for Linux/Mac/Windows, depending on your platform. This will copy an SSH port forwarding command, which you will run in a machine that has the SSH private key set previously.
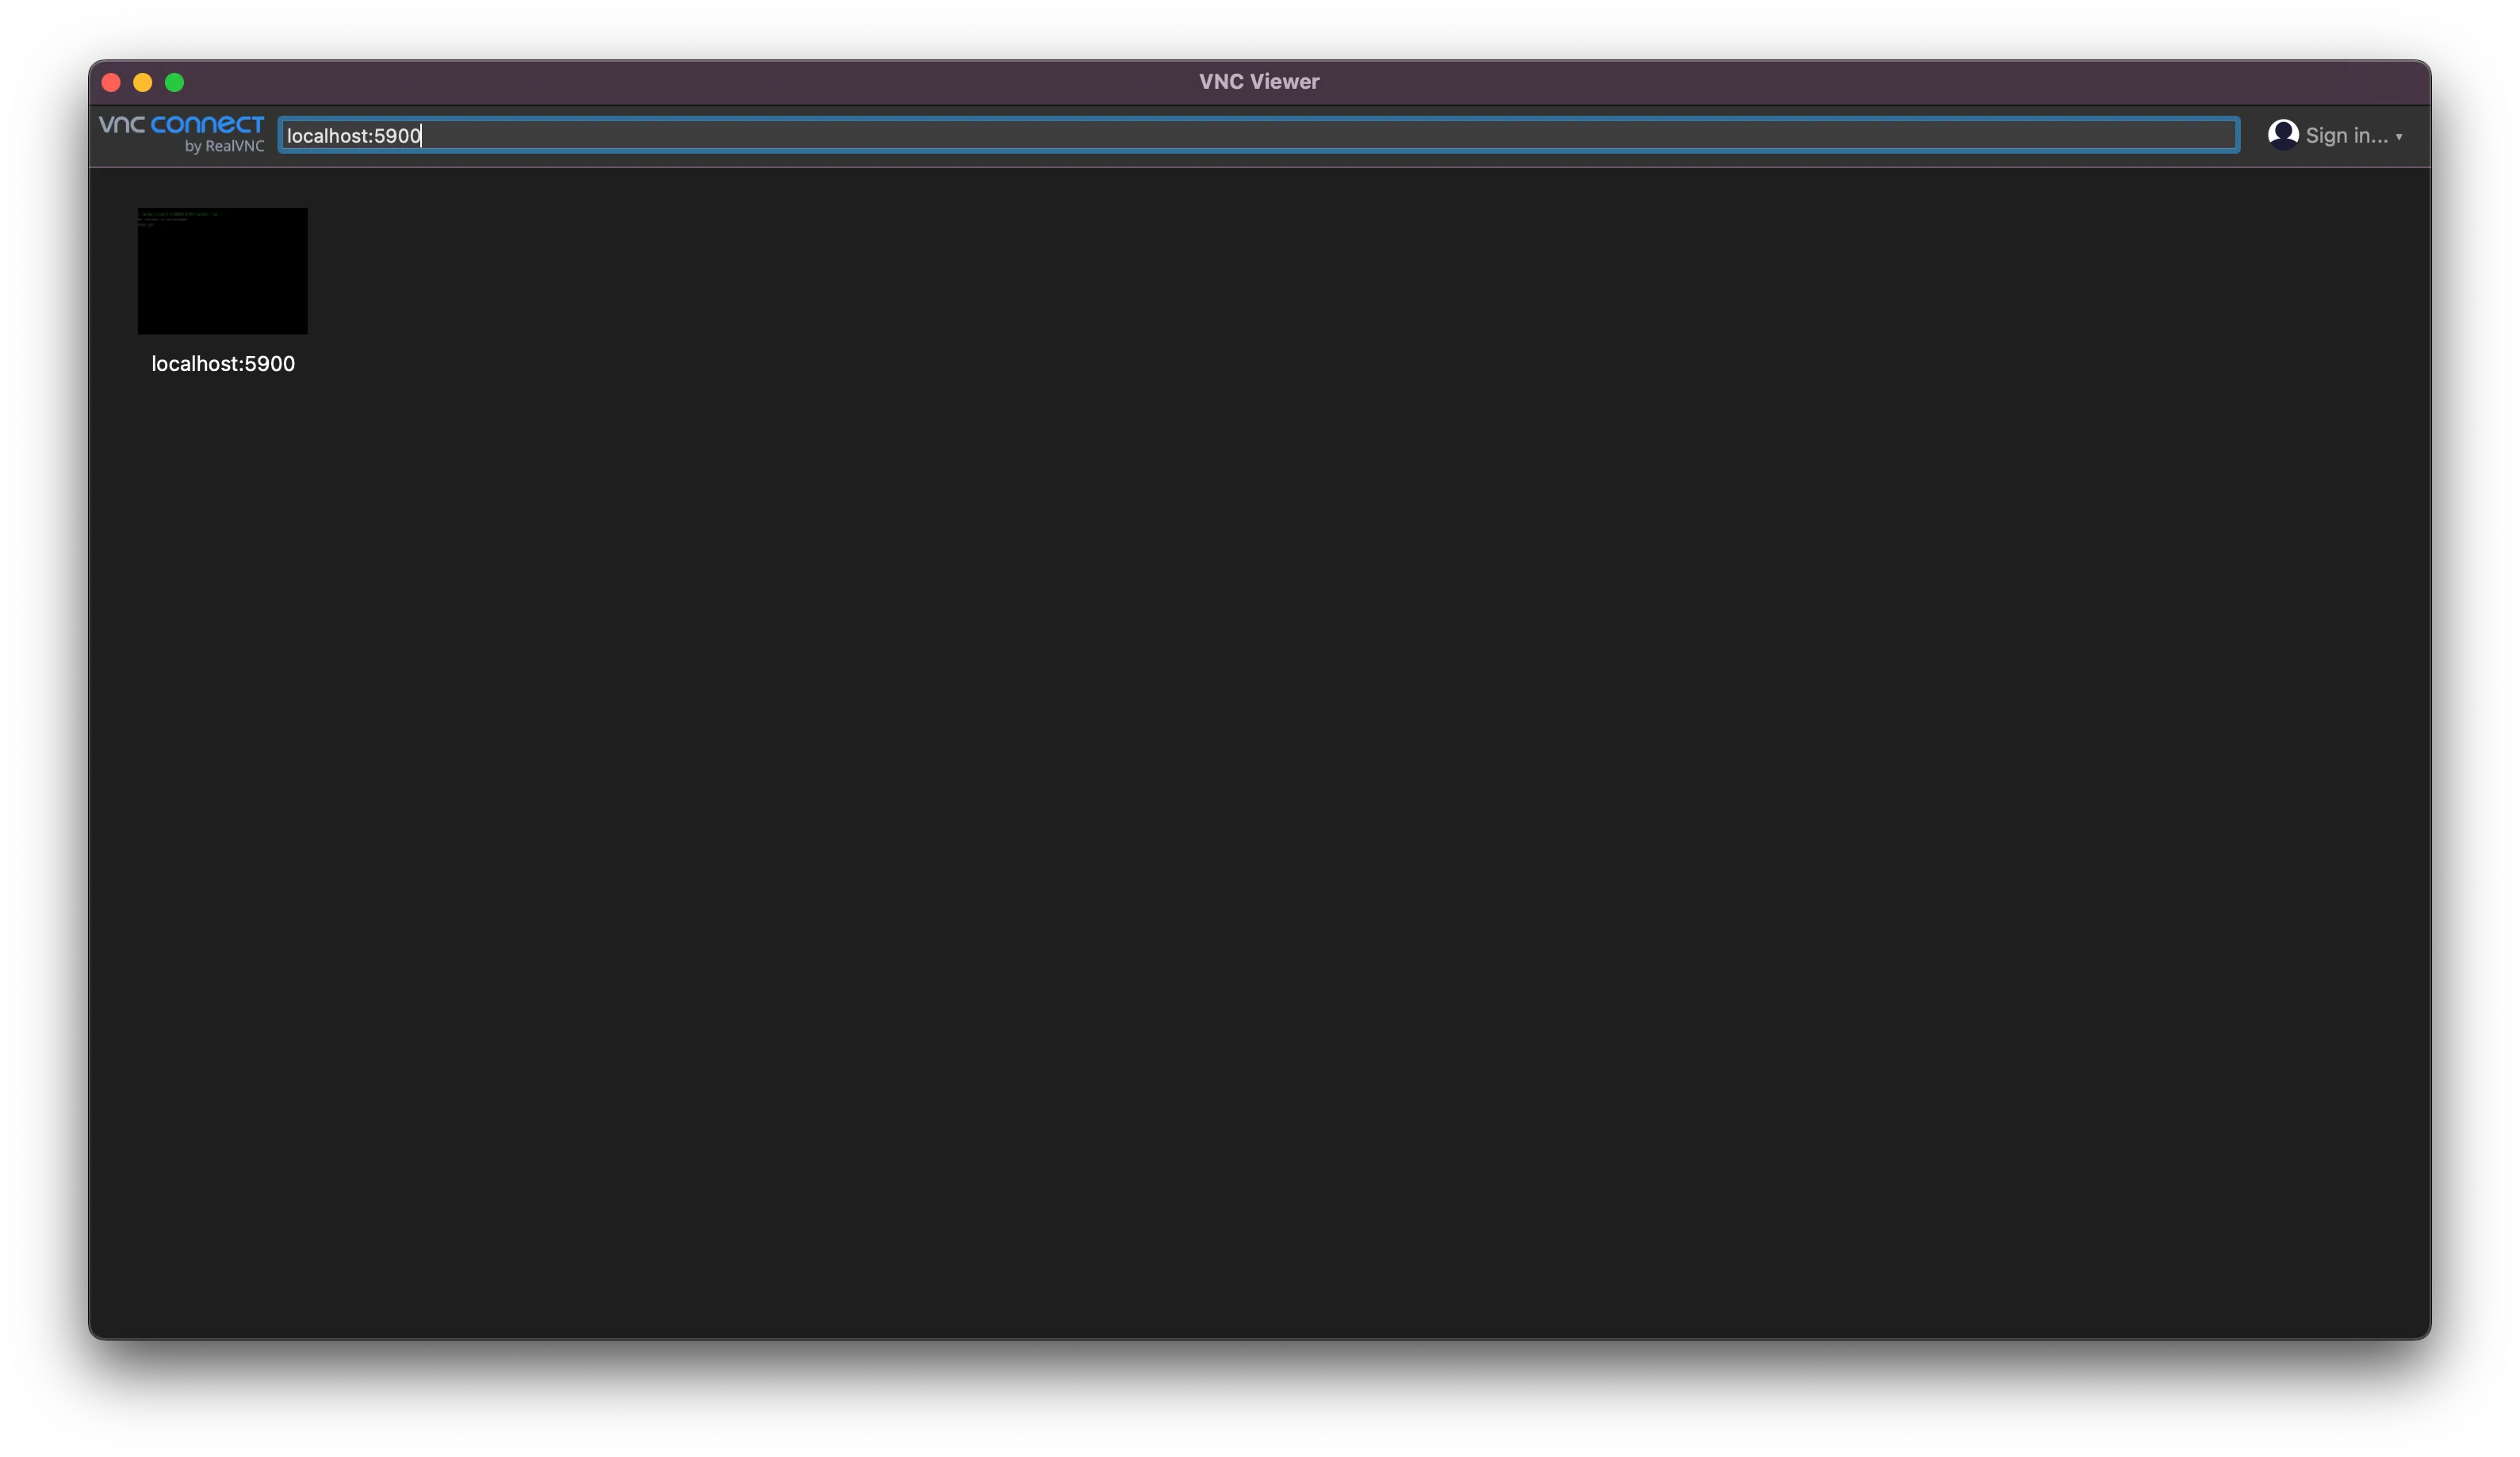
Run the SSH port forwarding command. If all goes well, the VNC connection is now bound to localhost:5900, which you can use a VNC client to connect to your cloud instance.
💡 If you’re on MacOS, the native Screen Sharing app does not work. Use a 3rd party VNC Client like RealVNC.
Part 3: Boot into netboot environment
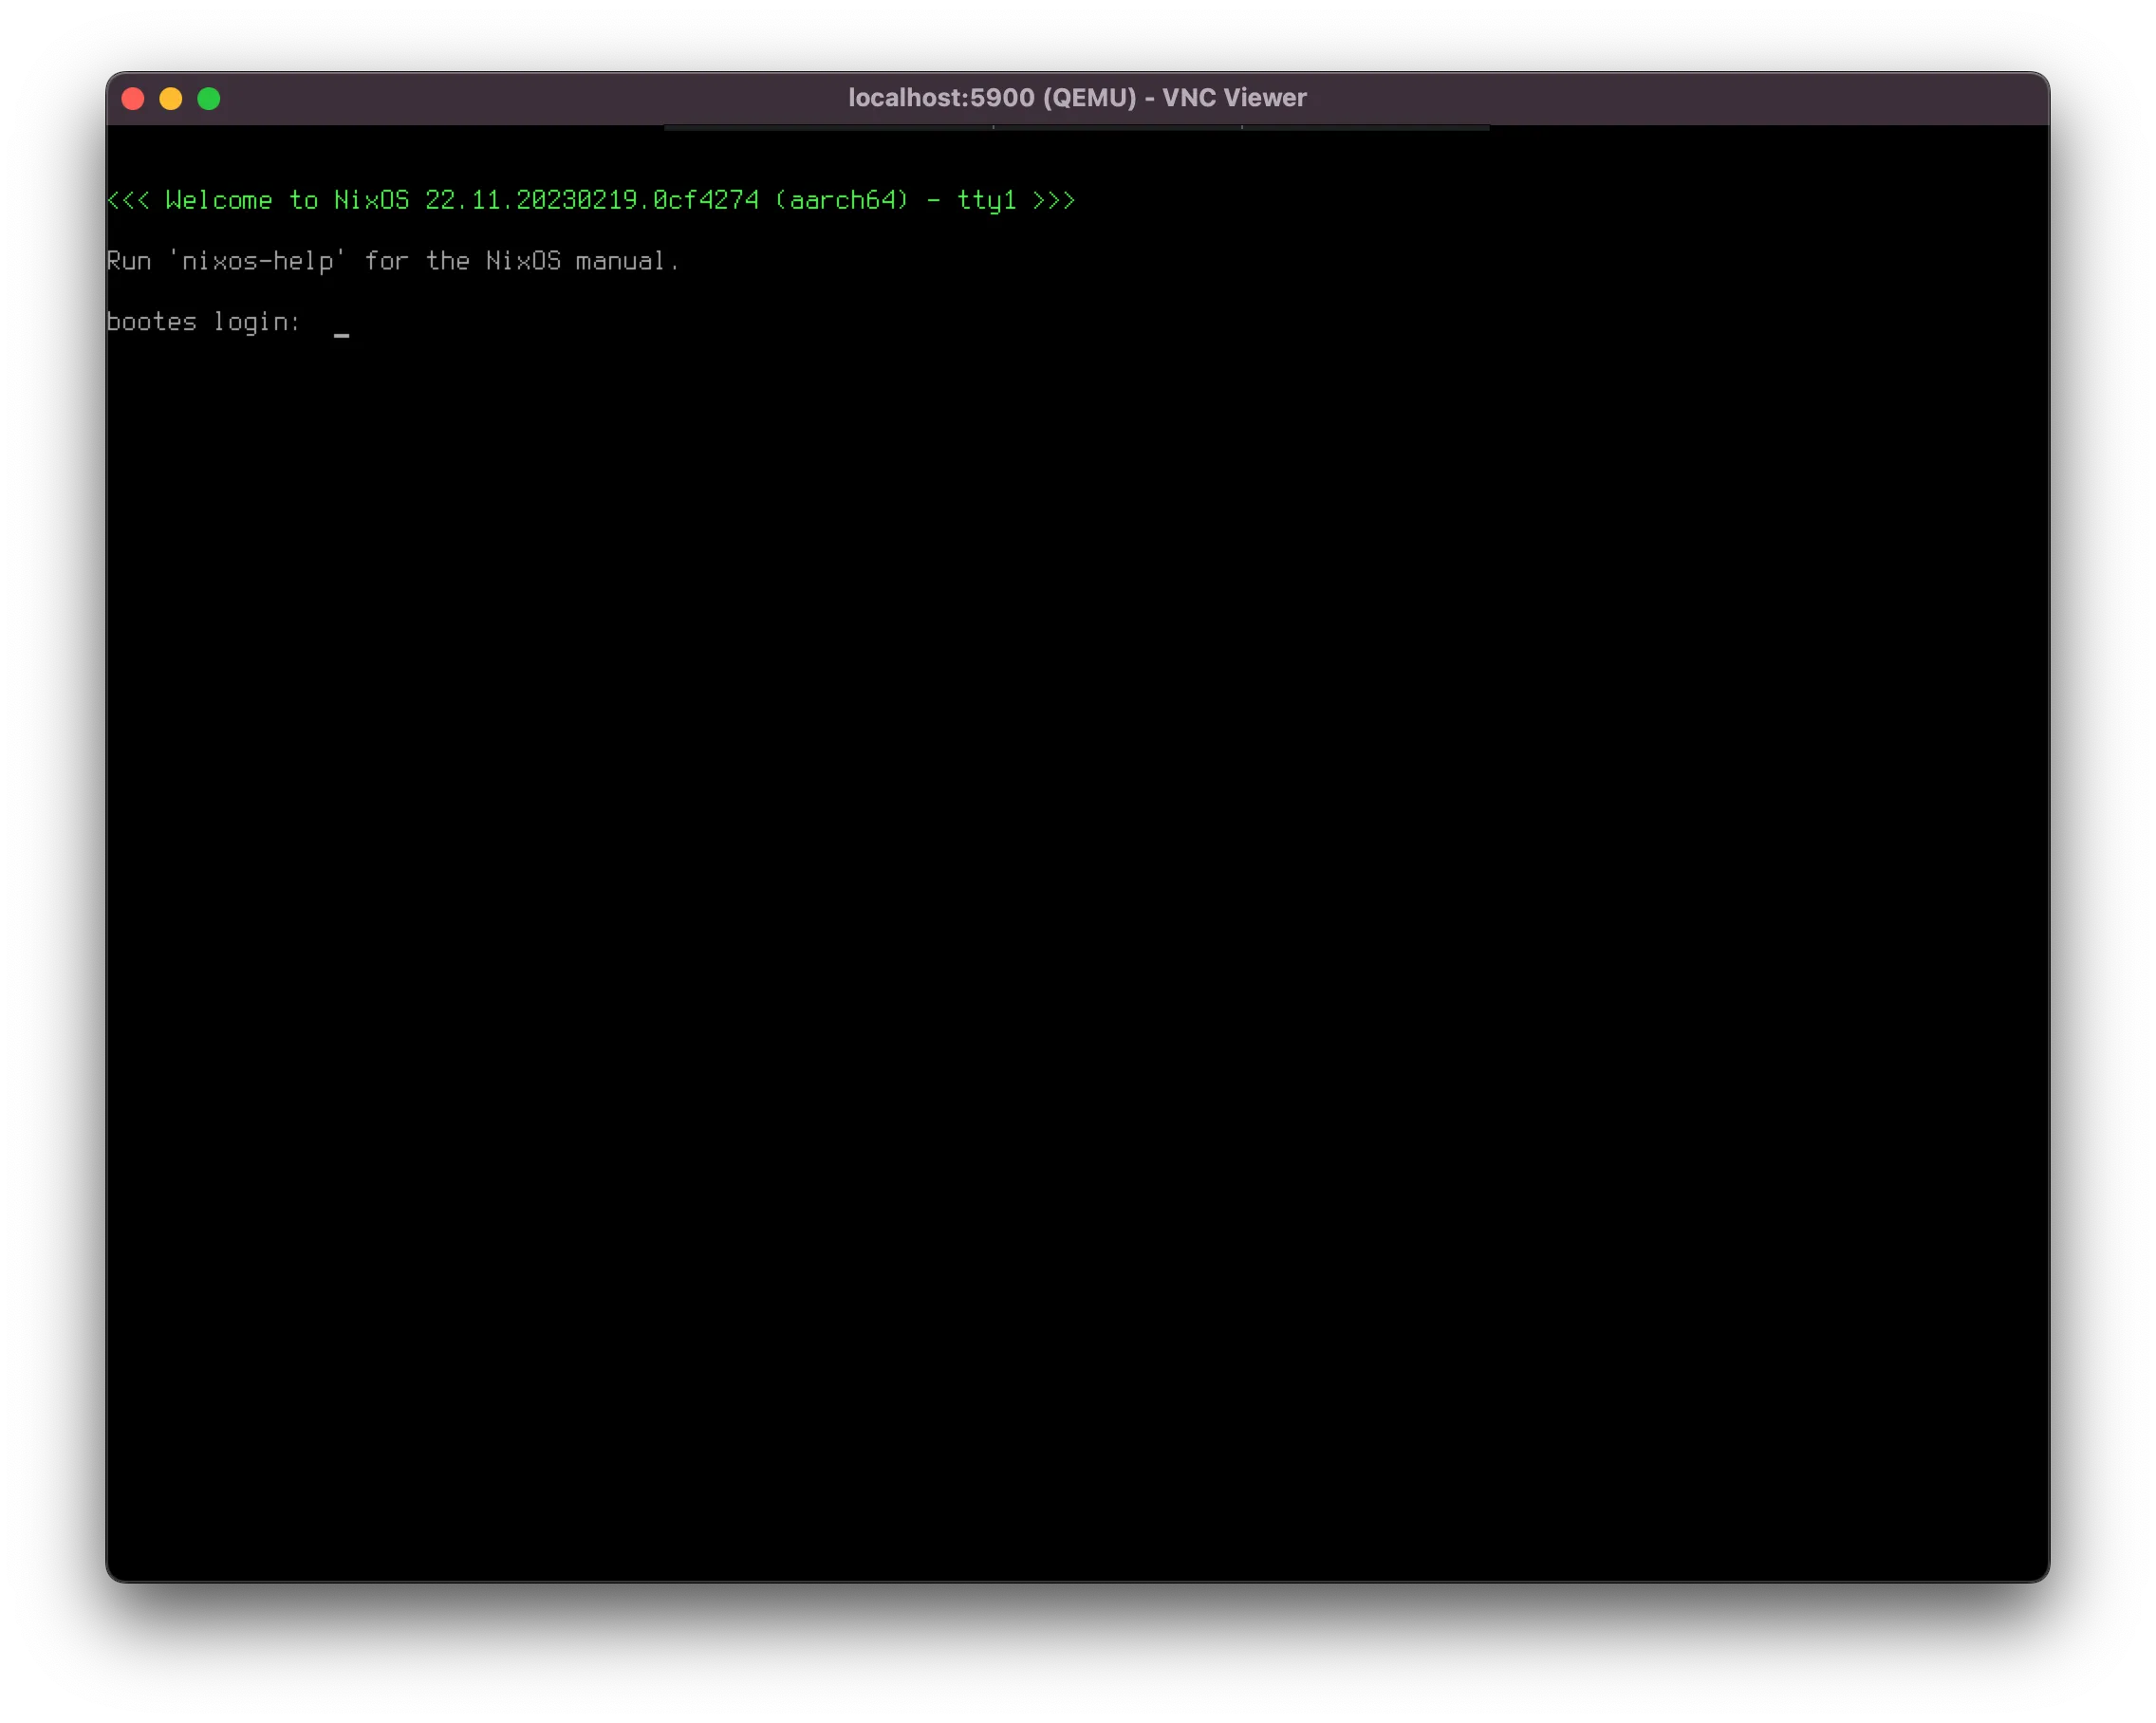
Using the VNC connection that you set up previously, login to root or a user with root privileges. Initiate a reboot command:
$ sudo rebootThe instance will now reboot. When you see a TianoCore boot screen, press Esc, which will then bring you to the UEFI menu:
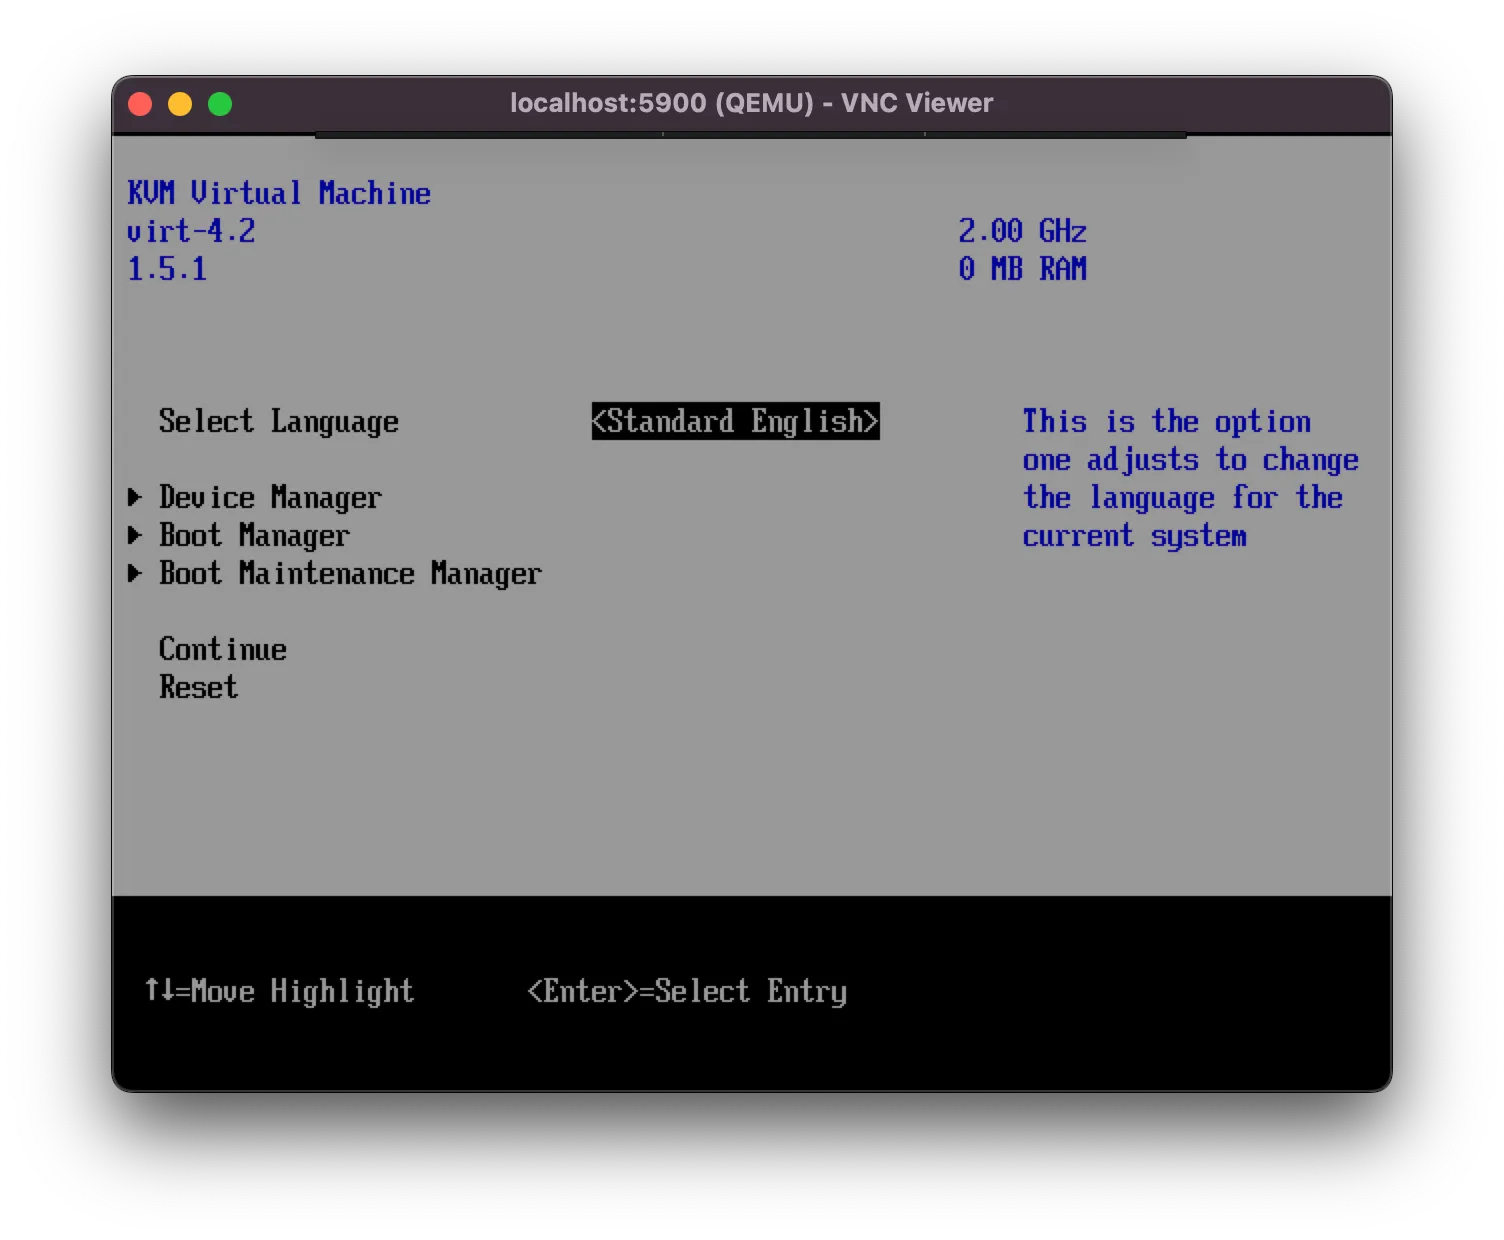
Select Boot Maintenance Manager > Boot From File > [disk details] > EFI > netboot.xyz-arm64.efi and hit Enter.
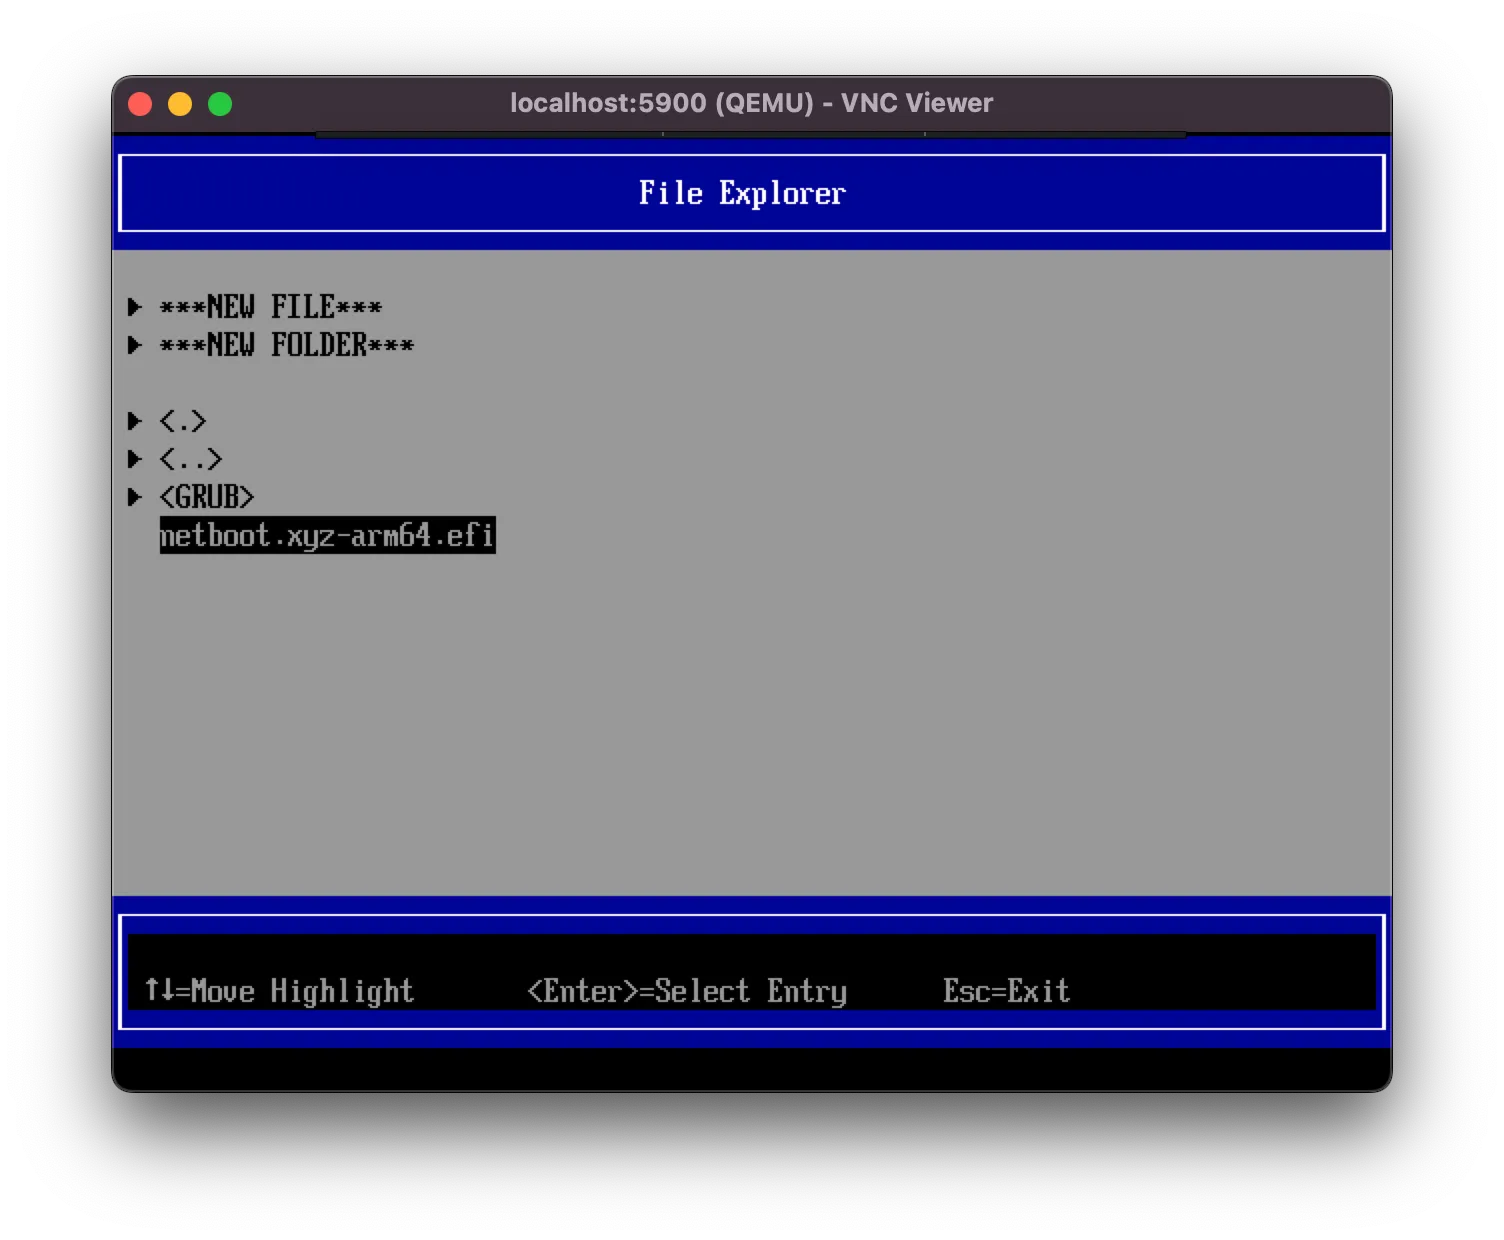
Once netboot.xyz is loaded, you should be greeted with the menu below:
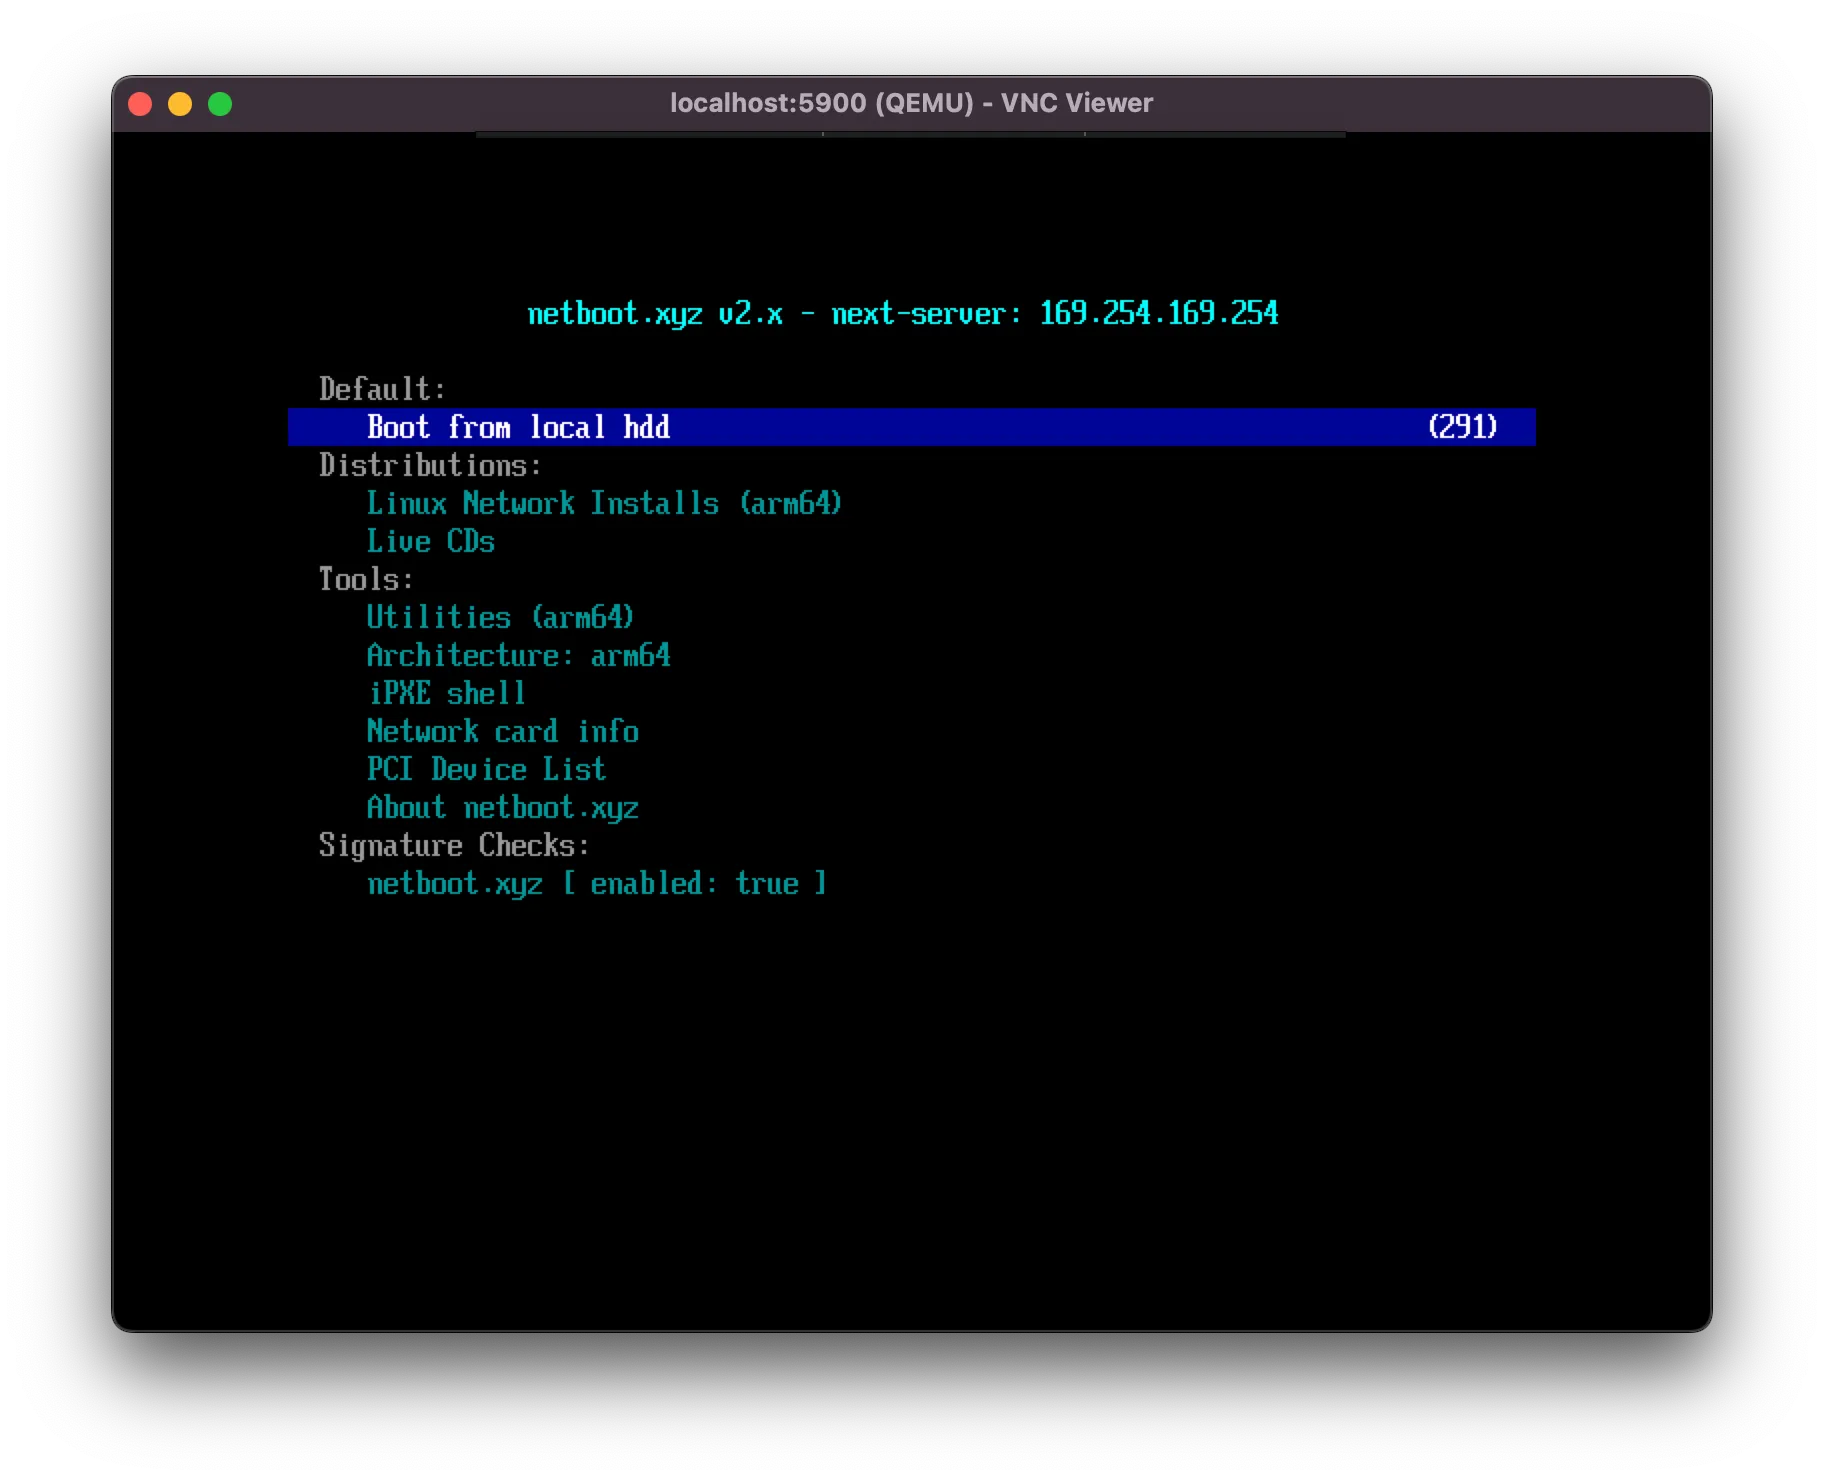
From here you can select Linux Network Installs, and select the Linux distro that you would like to boot into. Note that not all distro work, and if you’re stuck on a blank screen you can hit Ctrl + Alt + Del to restart your cloud instance and try a different distro. For me, I tried ubuntu, Debian and Alma Linux, and only Debian was the only one that works. Once booted into the live installation, just follow the prompts and you’ll have a fresh install of Linux in your cloud instance.
Self-taught full-stack web dev based in Tokyo.
Occasionally wrecks servers through
self-hosting
and
homelab-ing .