Exposing a Self-hosted Service with Cloudflare Tunnel
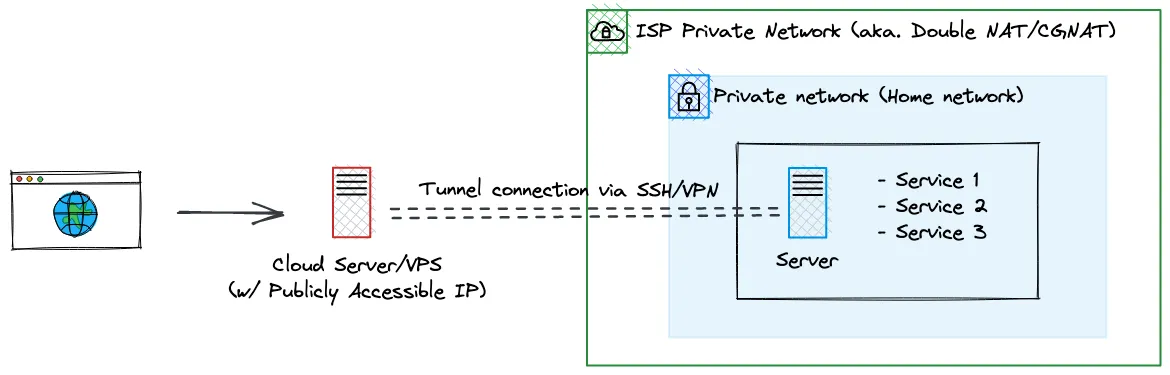
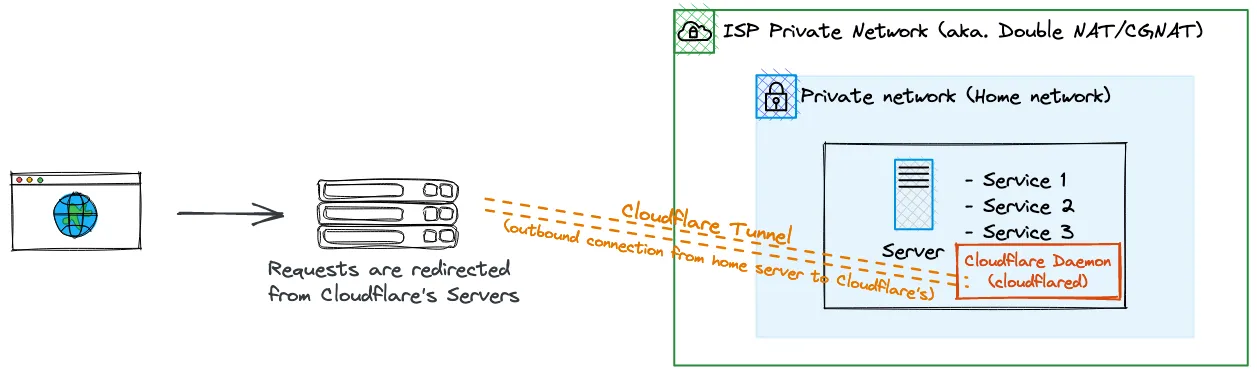
23 Sept 2022 | servers , docker , cloudflare , cloudflare-tunnel , port-forwardCloudflare Tunnel allows one to expose a service hosted within a private network without exposing part of the private network. It is a great alternative to conventional networking tunnels thanks to its ease of use.
I recently replaced my tunnel server hosted on Oracle cloud with Cloudflare Tunnel, allowing me to simplify my homelab setup.
Pros
- Port forwarding without opening your server ports
- Exposing services without worrying about security best practices
- Supports servers behind networks that cannot do port forwarding such as double NAT/CGNAT
- Cloudflare proxy features (DDoS protection, HTTPS) included by default
- Able to control who can access your services by adding an auth page before a user accesses a service
Cons
- Requires domain to be managed under Cloudflare’s DNS (not really a con but if you couldn’t move your DNS to Cloudflare…)
- Reliance on a third party hosted solution
- Some contents cannot be tunneled through Cloudflare Tunnel (video content such as Plex)
- Requires a daemon to be run within the private network (
cloudflared)
Zero Trust
If you looked into Cloudflare Tunnel, you might see the term “Zero Trust” comes up a lot. Cloudflare Tunnel service is a core part of the Cloudflare’s Zero Trust platform which aims to replace VPNs. Traditionally, a VPN would allow one to access everything within the network. On the other hand, Zero Trust networks tries to do differently with its “always verify” approach, requiring user to always authenticate before accessing a service.
Setting Up Cloudflare Tunnel
Step 1: Establishing a connection between Cloudflare and private network
According to the Cloudflare Tunnel docs, you can set up a tunnel either on Cloudflare’s Zero Trust dashboard or through your server’s CLI. Regardless of which method you choose, you’ll need to access the browser anyways, so I decided to set it up through the dashboard. The docs does a great job on explaining how to set up the tunnel so I’ll omit the explanations here.
Once the tunnel is created, I opted for the docker daemon as my services were already managed in a Docker Compose file.
services:
  cloudflare:
    image: cloudflare/cloudflared
command: "tunnel --no-autoupdate run --token ${CLOUDFLARED_TOKEN}"CLOUDFLARED_TOKEN is stored in a separate .env file so I could commit my docker-compose.yml without exposing my token.
Once the connection is established, the connection status will show ACTIVE on the dashboard.

Step 2: Configure forwarding to your self-hosted services
On the tunnel entry select Configure, and click on the Public Hostname tab. Let’s say if I want service1.iadw.in to redirect to a service hosted on the same server as the Cloudflare daemon on port 8080, I would set the Public hostname to service1.iadw.in and the Service value to http://localhost:8080.
Note that you can also redirect to a service hosted on another machine on your private network. If you want to redirect to a service on 192.168.1.5:3000, you would then set the Service value to http://192.168.1.5:3000.
The configs should look something like this:
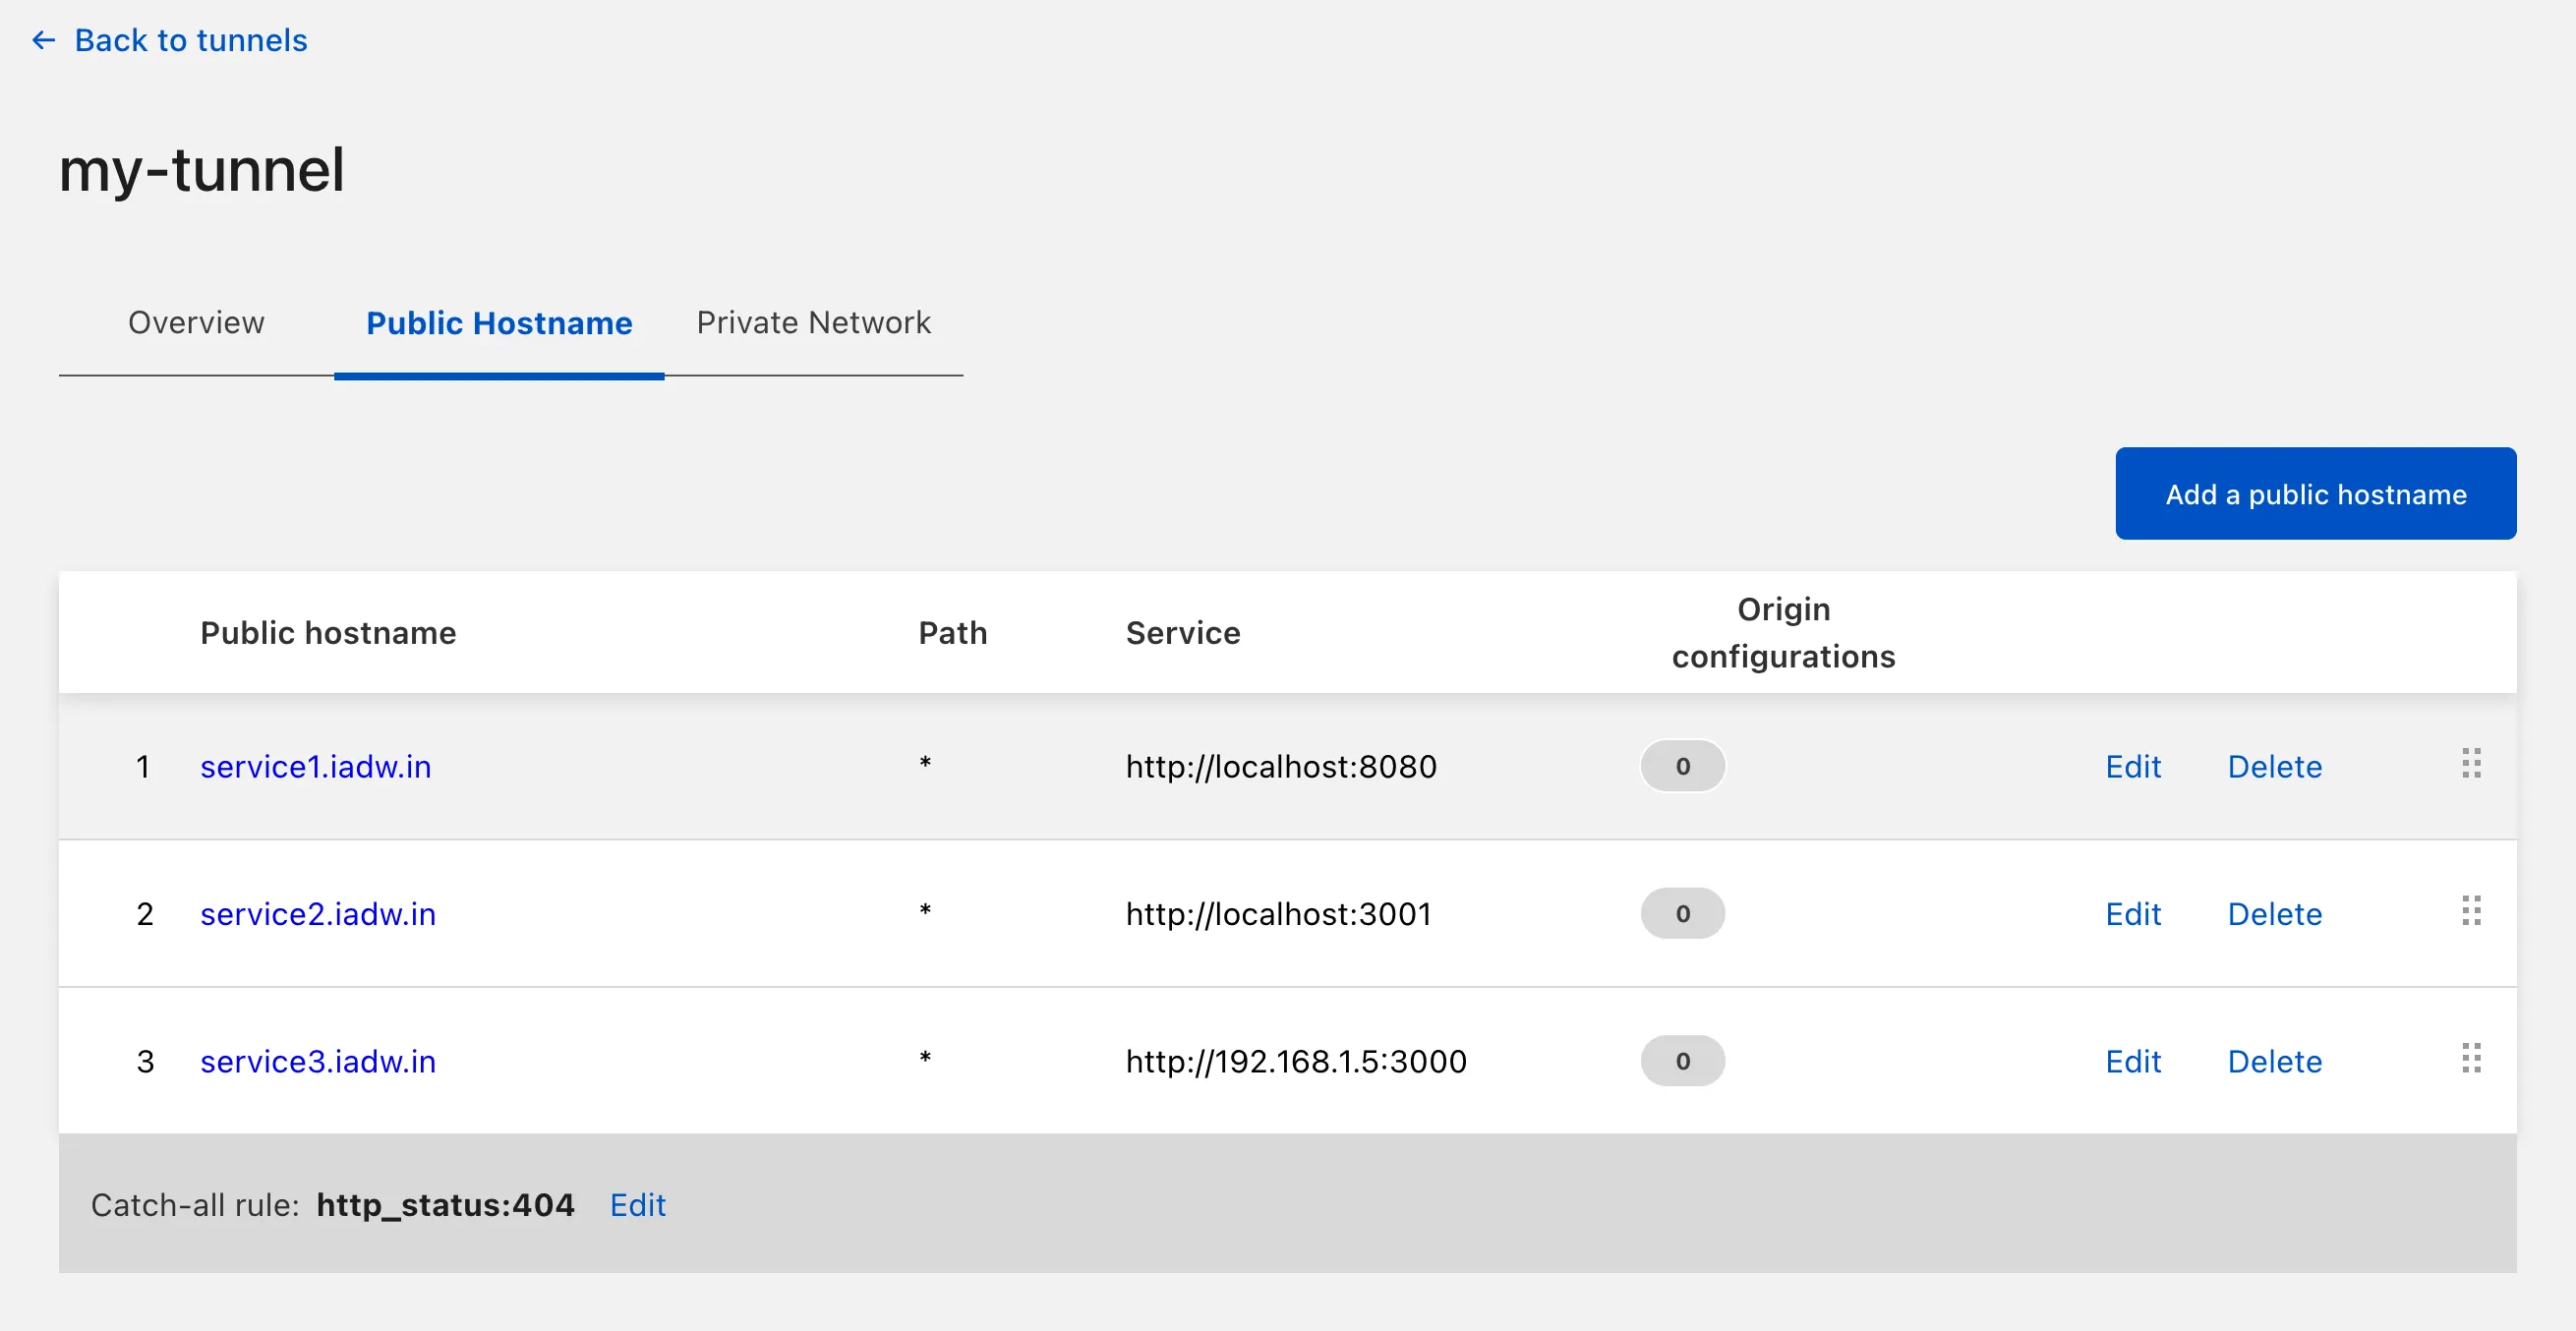
Cloudflare would automatically add the corresponding DNS entry for each route that you added here.
Step 3: (Optional) Setting up access controls
For services that do not have authentications, you can setup policies to authenticate your users instead. In short, you’ll need to add the service as a self-hosted application under Access > Applications, define a policy that consist of who and what authentication methods users can use, and add the policy to the application entry that you created.
By default, Cloudflare’s default auth method will send an email containing a code to your user, which your use will need to enter on the auth page. Other authentication method includes Google and SAML-based authentication.
Step 4: Try it out!
Access your applications via the Hostname that you defined previously. You should be able to view the service even without connecting to your local network, nor a VPN. Congratulations, now you’ve successfully set up Cloudflare Tunnel.
Self-taught full-stack web dev based in Tokyo.
Occasionally wrecks servers through
self-hosting
and
homelab-ing .